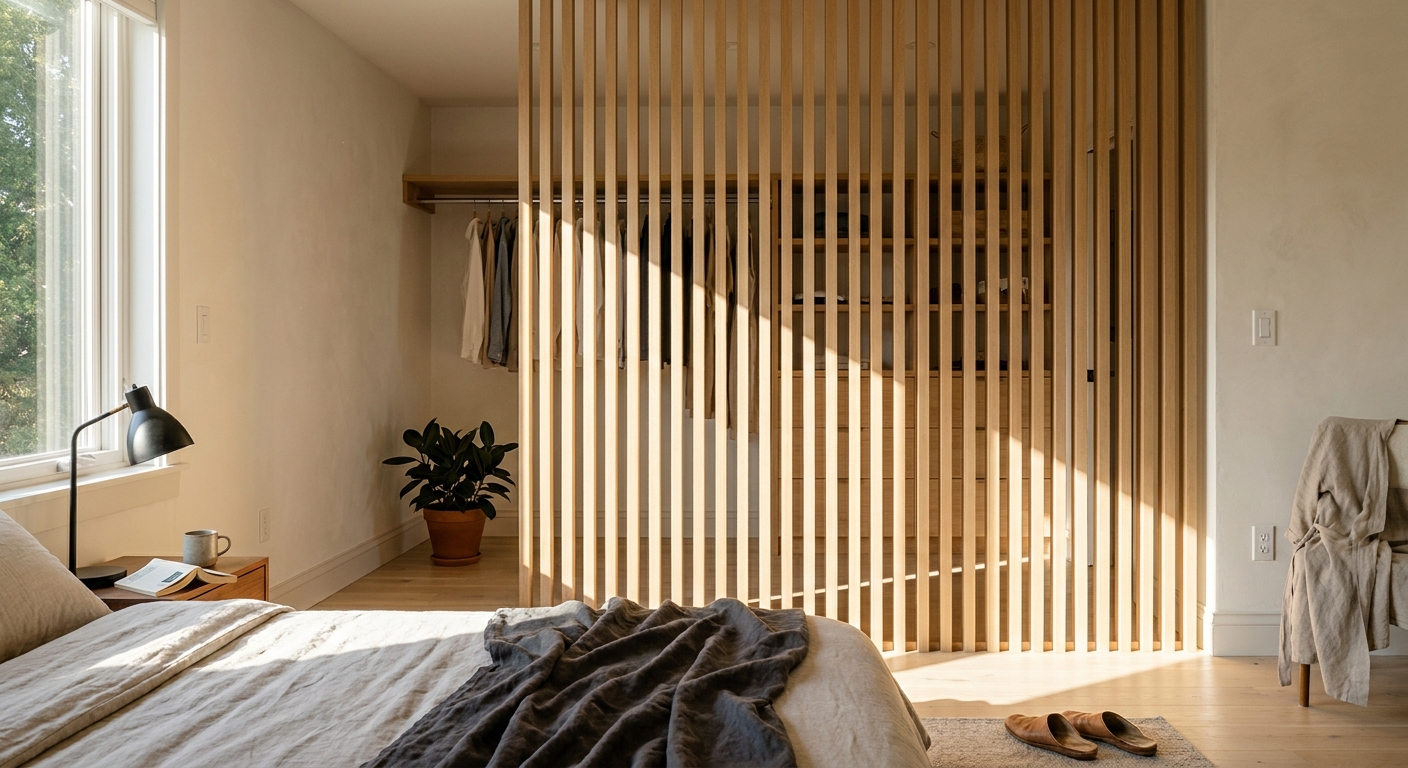
Primary suites have quietly grown a room that nobody quite finished designing. Somewhere past the bed there is a run of hanging rails, a dresser, a shoe wall, maybe a bench — a dressing area that exists functionally but has no edge to it. It bleeds into the sleeping space, so the first thing you see from bed is a rack of clothes. The obvious remedy is a stud wall and a door, which costs you the daylight and the sense of scale that made the suite feel generous in the first place. A wood slat closet divider solves the same problem differently: it draws a hard architectural line between sleeping and dressing while letting light, air and sightlines pass straight through.
This is one of the most requested applications we see, and it is also one of the easiest to get wrong — because a dressing area has requirements a living room divider does not.
Why a Dressing Area Needs a Boundary, Not a Wall
The functional ask here is modest. You are not trying to soundproof a closet or make it private from the rest of the house. You are trying to stop the visual noise of stored clothing from being part of the bedroom, and to give the dressing zone its own identity so that getting ready feels like a distinct activity in a distinct place.
That is a screening problem, not an enclosure problem, and screening is exactly what vertical slats do well. Standing square-on to a slat divider, the eye reads a continuous plane of timber and the contents behind it dissolve into shadow. Move to an oblique angle and the gaps open up, the space breathes, and light travels. In a primary suite, where the window is almost always on the bedroom side, that matters enormously — a solid partition turns a walk-in into a room you have to switch a light on to enter. A slatted one borrows daylight all day.
There is a secondary benefit that surprises people. Because a dressing area is full of soft goods, and because the divider itself is a run of solid timber faces broken by regular gaps, the combination noticeably tames the hard flutter echo that bare-walled suites often have. It is not an acoustic treatment, but the room sounds calmer.
Specifying the Divider: Sizing, Profile and Gaps
A dressing-area divider is usually the full height of the room and somewhere between six and twelve feet wide, often with a deliberate opening left at one end to walk through. SKANDINAVIA slats are made to measure for exactly this: lengths run 8ft, 9ft, 10ft, 11ft and 12ft, so a floor-to-ceiling run in a standard 9ft suite or a taller vaulted primary is a stock specification rather than a custom fabrication.
Cross-section is where the design decision actually lives:
- 2"×4" — the standard profile. Lightest visual weight, the most transparency at an angle, best when the divider is long and you do not want it to feel like a wall.
- 2"×5" — the mid profile. A good default for dressing areas, because the extra face depth closes down the oblique sightline into the closet a little more without darkening the run.
- 2"×6" — the bold profile. Strongly directional. From the bed it reads almost solid; from inside the dressing area you still get generous light. This is the one to choose if concealment is your priority.
Gap spacing does the rest of the work. Tighter gaps mean more screening and more slats; wider gaps mean more light and a lighter cost. Rather than guess, run your wall width, ceiling height, profile and gap through the Build and Price Your Divider tool at primopanels.com — it returns an exact slat count and price for the configuration you are describing, which is far more useful than a rule of thumb. Minimum order is 12 slats, which most full-height dressing-area runs comfortably exceed.
ROTERA or FIXERA?
Both systems suit this application, and the choice comes down to how you use the room.
FIXERA holds every slat at a fixed angle. It is the right call when the divider's job is settled — a permanent screen at a permanent orientation, quietly doing one thing well.
ROTERA lets the slats rotate, so you can turn the run closed for full screening while you sleep and open it flat for maximum light and easy access while you are actually dressing. In a primary suite, where the same wall serves two very different moods at 7am and 10pm, that adjustability earns its place more than it does almost anywhere else in the house.
Choosing a Finish That Works With Bedroom Light
Primary bedrooms are usually the lightest-handled rooms in a home — pale walls, linen, soft textiles — and the divider is going to be the single largest piece of timber in that palette.
White Oak is the natural fit for most suites. Its cooler, open grain sits comfortably against off-white walls and pale bed linen, and it holds its character in the flat, cool north light that a lot of bedrooms get. Walnut and Dark Walnut do something more dramatic: against a light room they read as a deliberate architectural insertion, and the contrast makes the dressing area feel like a separate, more intimate chamber. If the suite already has a dark floor or a dark headboard wall, walnut ties the room together; if everything else is pale, expect the divider to become the room's focal point — which is often the point.
For suites where the divider needs to disappear into the wall colour rather than announce itself, the paintable high-density MDF option takes any finish you like, and a divider painted out in the same shade as the surrounding walls is an elegant, restrained move. All finishes are available as free samples, which is worth doing before you commit — timber tone is very hard to judge from a screen, and bedroom light is unusually unforgiving.
Installing It Properly
This is a permanent architectural fixture, and it should be built like one. Slats are fixed to the ceiling and floor with the system's mounting rails, aligned to structure so the run is dead plumb and stays that way. That permanence is the entire value proposition: a fixed, precisely fitted divider becomes part of the house's millwork, in the same category as built-in wardrobes and panelled walls, rather than a piece of furniture standing in a room.
Two details worth planning before you order. First, decide where the walk-through opening goes and how wide it is — a 30–36" gap at one end is typical, and it needs to line up with how you actually approach the closet, not just with the middle of the wall. Second, if the ceiling is vaulted or sloped, say so up front; custom brackets and cut-to-length slats handle raked ceilings properly, but the geometry has to be worked out before fabrication, not on site.
Primo Panels supports the full sequence — design, estimating, and installation guidance — and ships flat-fee to the USA and Canada with all customs and brokerage covered. Slats arrive palletised at roughly 15 lb each, so arrange help for offloading. Any slat that arrives faulty is replaced.
Is It Worth Doing?
A dressing area is one of the few places in a home where a relatively contained piece of joinery changes how a room is used every single day. You stop seeing storage from the bed. The suite reads as two considered spaces instead of one ambiguous one. And unlike a stud wall, you keep the light, the volume and the option of an open sightline when you want it.
If you are working out what your run would take, start with the finish samples and the Build and Price tool — the specification usually resolves itself in one sitting once you can see the timber and the slat count side by side.